Stuffing Balls
For a fun twist on a holiday side dish, these oven-baked Stuffing Balls bake up golden brown and crispy on the outside, while still tender and full of flavor on the inside. With a traditional stuffing flavor profile of fresh onions, celery, parsley, and herbs, they are the perfect self-portioned side for Thanksgiving, Christmas, or anytime that will have everyone reaching for the last one.
Looking for another amazing side dish idea that will impress? Look no further than this Yorkshire Pudding Recipe! It has it all, a tender, almost chewy custard-like interior with a wicked crunch on the outside.

Absolutely! You can make them up to 24 hours in advance. Follow the recipe the whole way up to shaping the balls. Arrange in a single layer, on a rimmed baking sheet, lined with parchment paper, and cover tightly with plastic wrap. Set the pan out on the counter to warm up for 30 minutes before baking. Proceed to bake per the directions.
Why I Love This Recipe
- Easy stuffing recipe for every day
- Perfect for a Sunday dinner
- Excellent for the holidays
- Amazingly delicious
- Crispy and tender
Helpful Items for This Recipe
This post contains affiliate links. As an Amazon Associate, I earn a small portion from qualifying purchases at no extra charge to you.
Parchment Paper Sheets for Baking, 12×16 In 120 Pcs
Nordic Ware Naturals 3 Piece Set – Aluminum Commercial Quality Sheet Pan
6 Pcs Glass Measuring Cups with Lids Set, 1-Cup, 2-Cup, 4-Cup

What Are Stuffing Balls Made Of?

Stuffing balls are made from just what you would expect, the same ingredients you would use to make stuffing. We have just added a couple of ingredients so they can be formed into balls.
Ingredients
Unsalted butter – Salted butter can be used, but adjust your seasoning accordingly.
Red onion and celery – Do I have to use red onions? While yellow onions or even shallots may be used, red onions develop a sweetness that complements the bold flavors of the sage and marjoram. Plus, their subtle flecks of color add to the inviting color profile of the assembled Stuffing Balls.
Flat-leaf parsley – Can I use dried parsley instead of fresh? Technically, yes, but although parsley does not change the overall flavor, it does enhance the flavor and is definitely worth using freshly chopped leaves when available. Choose flat-leaf parsley over curly for more impact.
Minced garlic – This adds depth of flavor and is needed in this recipe.
Broth (turkey, chicken or vegetable) – Use what you have on hand. If you would like to have this vegetarian, then you can use vegetable stock.
Kosher salt and pepper – Season to taste, being careful if your broth and butter are salted.
Ground sage, onion powder and marjoram – These spices and herbs add the best flavor for the holidays.
Unseasoned bread cubes – You want to use cubes for this recipe not crumbs. Uniform Bread Cubes Work Best! If your bread cubes are particularly large, or have large pieces mixed in, it is advisable to break them up into 1-inch pieces or smaller. It will make creating the balls much easier without having large chunks sticking out. *See note in Little Chef’s Secrets.
Large eggs – The eggs added in this recipe do a great job of helping hold their shape and also add another level of crispness to the outside edges. If the mixture feels a little dry and does not want to hold together, add another tablespoon or two of broth (or water) to the mixture and work it through with your hands until it sticks together well enough to form the balls. Bake as indicated and check for the desired crispness before removing from the oven.
How to Make Stuffing Balls


Preheat the oven to 375°F. Line a rimmed baking sheet with parchment paper. Set aside.
In a large, deep skillet, melt the butter over medium heat.
Add the onions, celery, and garlic, stirring often, and cook until softened (about 5 minutes).
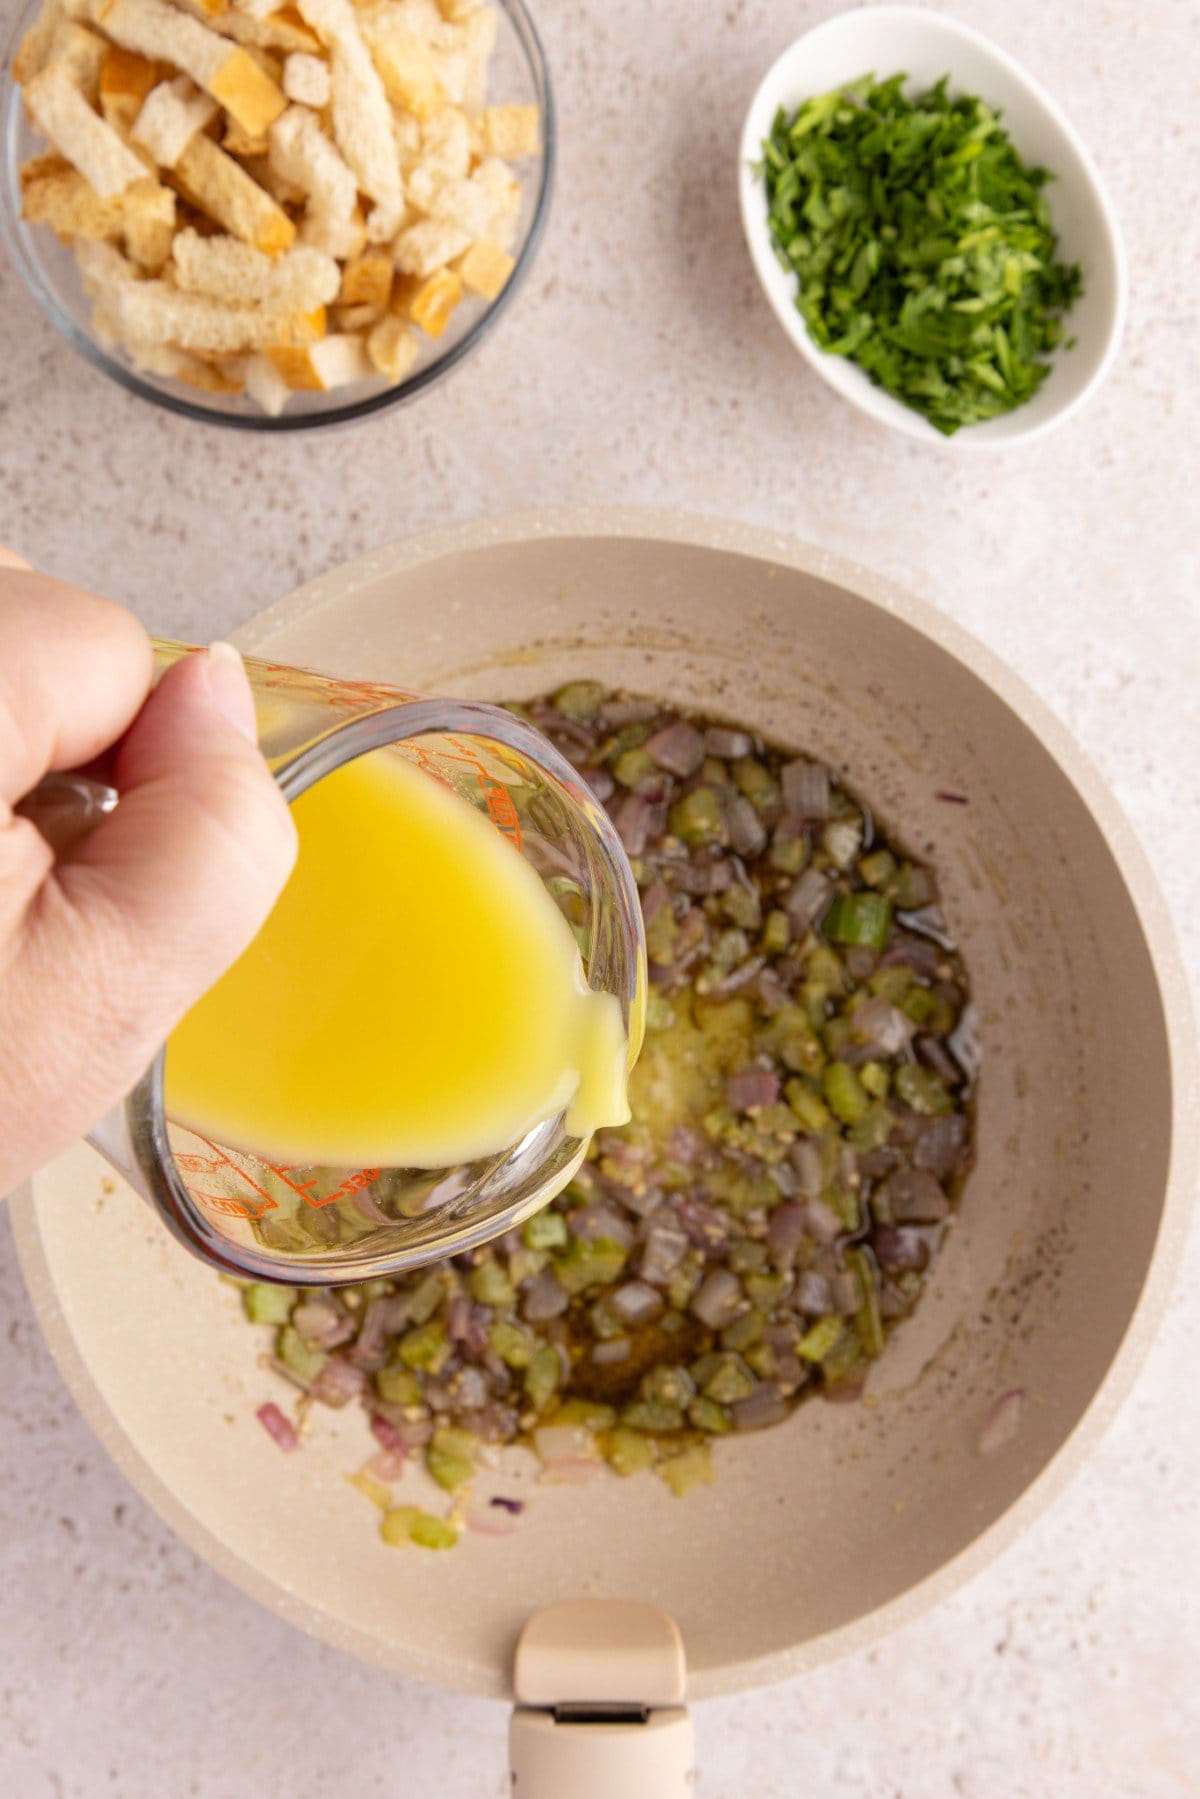
Mix in all of the seasonings, including the chopped parsley. When mixed well, pour in the broth and stir.


Once the broth mixture has heated through, turn off the heat and add the bread cubes. Fold all the ingredients together until well incorporated, and all of the bread is softened, and there is no visible liquid remaining. (Note that at this point it will still look a little on the dry side, but as long as there is no visible dry bread remaining, you are good to move on to the next step.)
Let the stuffing cool for a few minutes until able to be handled with your bare hands.
Make a well in the center of the stuffing and add the egg.


Using your hands, like you do when making a meatloaf, work the eggs evenly through the stuffing.
To ensure even-sized servings, use a ½-cup measuring cup to scoop up the stuffing (a little over-full). Shape into well-rounded balls and place on a rimmed baking sheet, 1 to 2 inches apart.
Place the baking sheet on the middle rack of the preheated oven and bake for 20 minutes, until the outer edges are slightly crispy. Use a fork to tap the outside to check for crispness.

Remove from the oven and let rest for 3-5 minutes before serving.

Little Chef’s Secrets

*Bread Cubes
Many grocery stores will bake up their leftover loaves of bread and offer bags of unseasoned bread cubes at a fraction of the price of brand-name packages. Have some extra time? Make your own. Chop or tear the leftover bread into ½- to 1-inch pieces and scatter them in a single layer on a large baking sheet. Bake at 300°F for 35-40 minutes or until well dried out and crunchy. Let cool completely and store in an airtight container until ready to use. Almost any type of bread can be used, even the last few slices of your brand-name sandwich bread.
Variations With Delicious Add-Ins
Some folks like traditional tasting stuffing, which is absolutely what this recipe delivers. But for those who like a little variety and flavor twists, try adding fresh, chopped apples, walnuts, or cranberries. Sauté these additional ingredients with the onions and celery. (Note: If you use fresh cranberries, it may turn your stuffing mix slightly pink, but it is so worth the extra punch of flavor that they bring to the dish.) For a ‘harvest’ variation, add some sausage or chopped giblets.
Can Stuffing Balls be Made in Advance?
Absolutely! Up to 24 hours in advance, follow the recipe the whole way up to shaping the balls. Arrange in a single layer, on a rimmed baking sheet, lined with parchment paper, and cover tightly with plastic wrap. Set the pan out on the counter to warm up for 30 minutes before baking. Proceed to bake per the directions.
Can Stuffing Balls be Cooked in an air fryer?
Yes! Preheat the air fryer to 350°F for 2-3 minutes. Prepare the stuffing balls as directed and place them in the basket (or tray), leaving at least 1 inch of space between them to allow for ample air circulation. Air fry for 12-15 minutes. Check the level of crispness by tapping with a fork.
How do I store and reheat any leftovers?
Store, refrigerated, in an airtight container for up to 5 days. For best results, reheat in the oven at 350°F for 10 minutes or until heated through, or use an air fryer at 325°F for 5-7 minutes. If you must use a microwave to reheat, please note that they will likely lose some of their crispness.


Stuffing Balls Recipe
Ingredients
Equipment
Method
- Preheat the oven to 375°F. Line a rimmed baking sheet with parchment paper. Set aside.
- In a large, deep skillet, melt the butter over medium heat.
- Add the onions, celery, and garlic, stirring often, and cook until softened (about 5 minutes).
- Mix in all of the seasonings, including the chopped parsley. When mixed well, pour in the broth and stir.
- Once the broth mixture has heated through, turn off the heat and add the bread cubes. Fold all the ingredients together until well incorporated, and all of the bread is softened and there is no visible liquid remaining. (Note that at this point it will still look a little on the dry side, but as long as there is no visible dry bread remaining, you are good to move on to the next step.)
- Let the stuffing cool for a few minutes until able to be handled with your bare hands.
- Make a well in the center of the stuffing and add the egg.
- Using your hands, like you do when making a meatloaf, work the eggs evenly through the stuffing.
- To ensure even-sized servings, use a ½-cup measuring cup to scoop up the stuffing (a little over-full). Shape into well-rounded balls and place on a rimmed baking sheet, 1 to 2 inches apart.
- Place the baking sheet on the middle rack of the preheated oven and bake for 20 minutes, until the outer edges are slightly crispy. Use a fork to tap the outside to check for crispness.
- Remove from the oven and let rest for 3-5 minutes before serving.