Ingredients
For the dry brine:
- 3 Tablespoons Kosher salt
- 1 ½ Tablespoons sumac
- ½ Tablespoon rubbed sage
- ½ Tablespoon Italian seasoning
- 1 teaspoon black pepper
For the turkey:
- 1 Turkey 10-12 pound whole turkey, thawed if from frozen
- ½ cup 1 stick salted butter, at room temperature
- 1 Tablespoon fresh thyme leaves
- 1 Tablespoon lemon zest
- 1 apple sliced into wheels
- 1 sweet onion quartered
- 4 stalks of celery chopped
- 2 Tablespoons roasted minced garlic divided
- ¼ cup fresh sage leaves
- 2 lemons sliced into wheels
- 1 cup chicken broth or more
For the gravy:
- ½ cup butter
- ½ cup all-purpose flour
- ½ teaspoon apple cider vinegar
- Kosher salt and pepper to taste
- 2 cups Drippings from the cooked turkey or turkey/chicken broth
- Turkey or chicken broth for thinning gray if necessary.
Method
- Start this process 2 days before you plan to cook your turkey. In a small bowl, stir together the salt, sumac, rubbed sage, and Italian seasoning until fully combined.
- Rub the mixture over the inside and outside of the turkey until it is completely coated and all the seasoning is used. Make sure you get under the skin of the breast and legs, but be gentle here, as the skin can tear easily in these tender places.
- Place the turkey on a large, lipped baking pan lined with a cooling rack or in a roasting pan fitted with a rack. Lightly cover the turkey with foil or plastic wrap and refrigerate for 2 days.
- 1-2 hours before you’re going to cook the turkey, pull it out of the refrigerator to bring it closer to room temperature.
- Remove all but the bottom rack in your oven and preheat to 375°F.
- In a small bowl, mix the softened butter with the fresh thyme leaves, 1 tsp garlic, and lemon zest. You can easily remove the leaves from the woody stem by pinching the top of the stem and gently pulling towards the bottom.
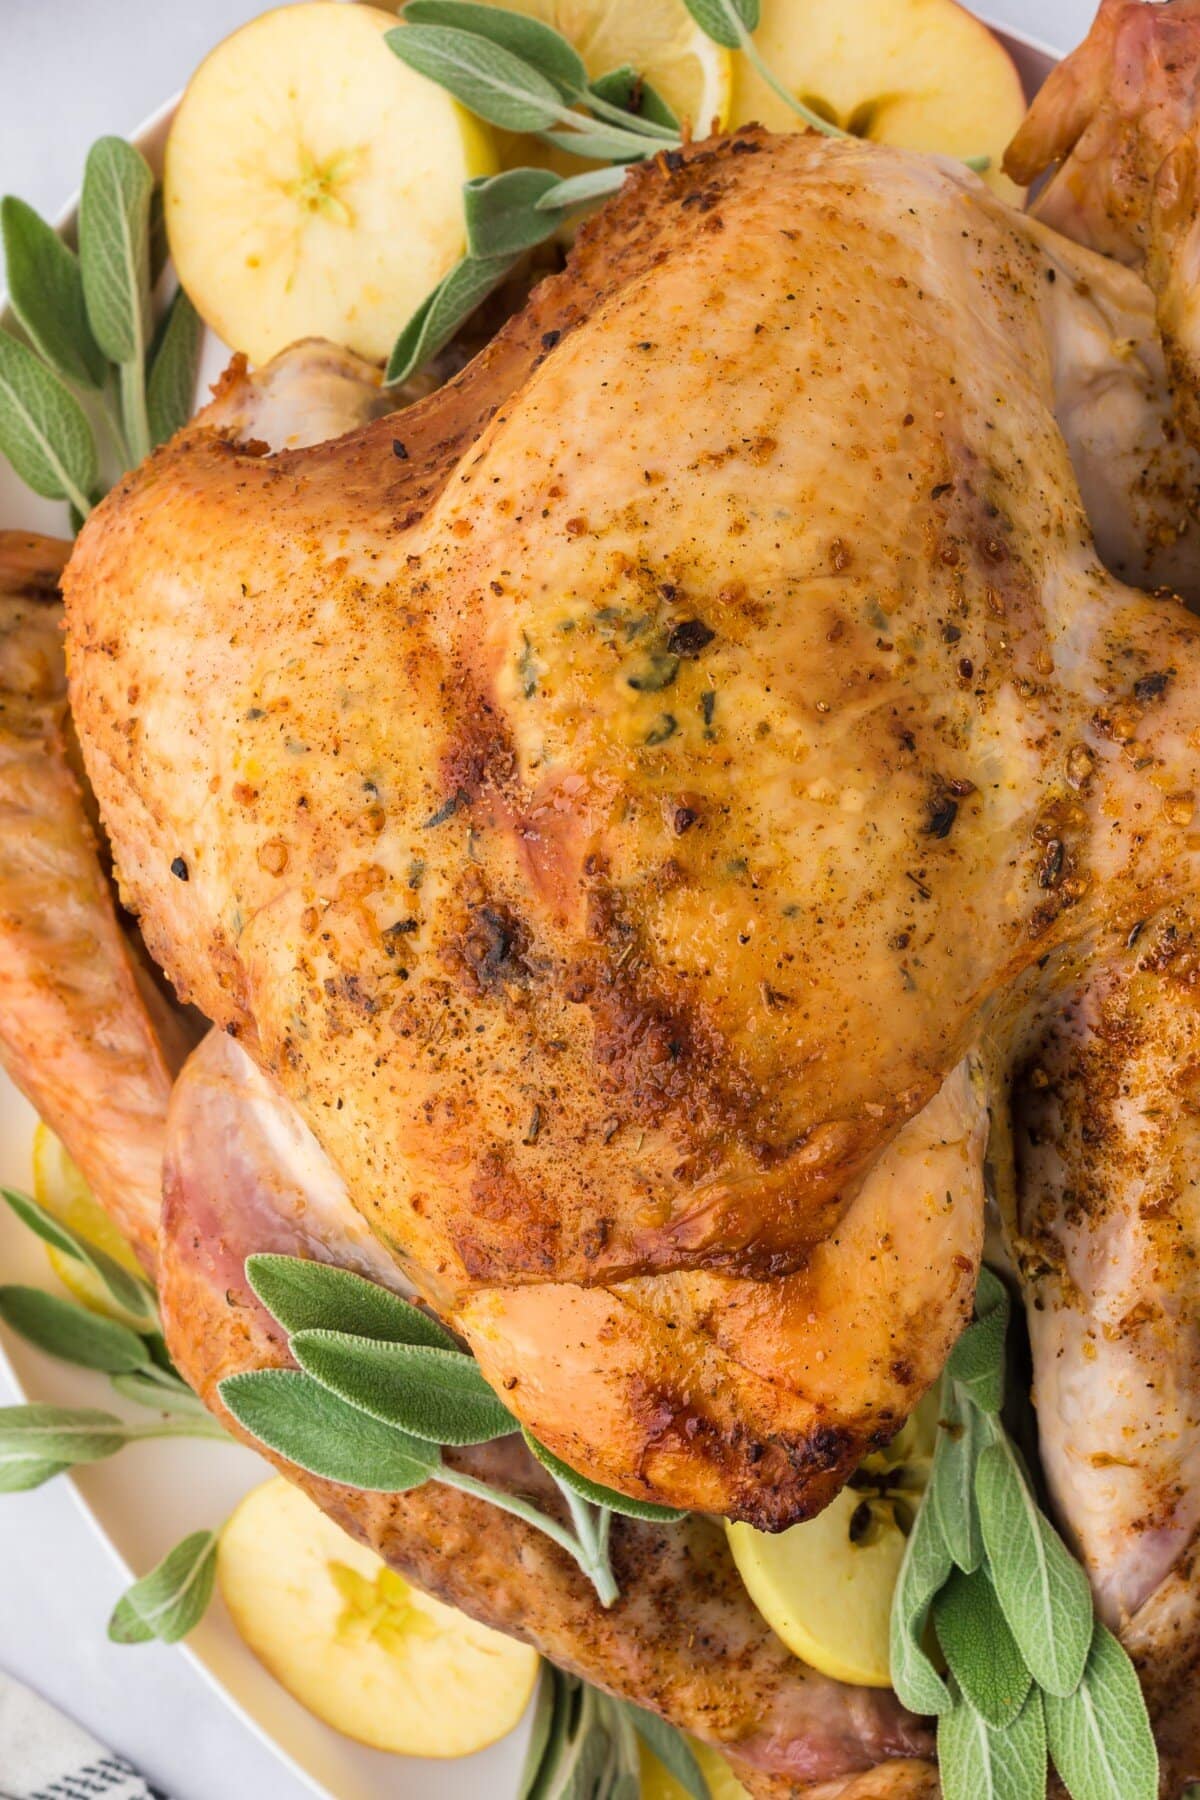
- Place your turkey, breast-side up, in your roasting pan, and stuff the cavity with apples, onions, celery, roasted minced garlic, sage, and lemon wheels. Do not overstuff your turkey, as that will cause it to need to cook longer.
- Divide the butter in half and place half under the skin of the breast, spreading it as smoothly as possible. Smear the other half of the butter on the outside of the skin, covering the entire bird. Be sure to get the legs and wings too, since those are often overlooked.
- Tuck the wing tips behind the body of the bird and, if the bird's legs are not already tied, use butcher’s twine to secure the legs together at the ends. This helps to prevent them from burning while the rest of the bird cooks.
- Pour the chicken broth into the bottom of your roasting pan. The broth keeps the turkey tender and juicy. Make sure you keep an eye on this and add more broth as needed while the turkey is cooking. Don't overfill the stock as that will steam the turkey.
- Bake your turkey breast side up, uncovered, for about 15 minutes per pound. You can take a peek at how the turkey is browning by using the oven light and peering through the oven window, but try to keep the door closed as much as possible. Opening the oven will lower its temperature, resulting in a dry turkey. If you notice the turkey getting too brown, tent it with foil. You’ll know when your turkey is done when the internal temperature of the thickest part of the thigh is 160°F. At this point, you can remove the turkey from the oven, and it will reach 165°F while it rests.
- Remove the turkey from the roasting pan and let it rest for 30 minutes before slicing and serving. It’s important to let the turkey rest so that it can carryover cook to the correct temperature and to allow the juices to reabsorb into the meat. Resting keeps the moisture in the meat of the turkey, and the temperature will come up to 165F.
- Strain the drippings: While the turkey is resting, strain the drippings and juices from the roasting pan into a small bowl; you will need about 2 cups. You can use turkey or chicken broth if you don't have enough pan drippings. Remove the herbs and fruit out of the cavity of the bird. They’ve given all of their flavor, so you can toss them in the trash. If your bird didn’t create enough liquid to make drippings, use a spatula to scrape the bottom of the roasting pan and mix it with a bit of broth; then continue with this step.
- Meanwhile, in a medium saucepan over medium heat, add the butter for the gravy until it’s completely melted.
- Slowly whisk in the flour until it looks like a paste and all the flour is hydrated. Let it cook on low, stirring occasionally, for about 1-2 minutes to cook off the raw taste of the flour.
- Whisk in the apple cider vinegar along with the Kosher salt and pepper to taste.
- While whisking continuously, slowly stream in the strained drippings into the flour mixture. Going slowly will help you avoid clumps that make a lumpy gravy. Let the gravy simmer for 5-7 minutes until it coats the back of a spoon. IF you want the gravy a little thinner, add more stock. If you want the gravy to be thicker, you can always gradually add more flour mixed with butter at a 1:1 ratio, a tablespoon at a time, until you get the consistency that you like.
- Carve the turkey and serve it warm with the gravy.
Nutrition
Serving: 1gCalories: 277kcalCarbohydrates: 17gProtein: 3gFat: 24gSaturated Fat: 15gPolyunsaturated Fat: 1gMonounsaturated Fat: 6gTrans Fat: 1gCholesterol: 63mgSodium: 3132mgPotassium: 173mgFiber: 2gSugar: 6gVitamin A: 795IUVitamin C: 20mgCalcium: 50mgIron: 1mg
Notes
See the post for more information, photos and tips.